Micro Green Fruit and Veggie Juice {Purple Juice}

Pin It

I've never been an overly ambitious juicer but have always admired the many that could maintain a juicing lifestyle.  One day I will conquer a 24 hour juice fast, for now I like to use it as a supplement.   


Since I'm fairly new to juicing, I add a wee bit of agave nectar and that tends to take the earthy edge off of the root vegetables.  Also, incorporating some fruits can naturally add some sweetness.  

Are you a juicer?  I would love to read about your favorite juicing combinations! 


My purple juice was a hodgepodge of fruits and veggies.  It's amazing how many veggies/fruits go into a glass.  3 apples, 2 pints of blueberries, a 1/2 cup of micro greens, a bundle of chard, a bundle of dandelion greens and 3 beets!  Whew! 

Juicing is the fastest way to digest all the nutrients from veggies. I eat a lot of veggies but definitely don't take in the recommended 6-8 servings, juicing makes that number much easier! 


Micro Green Fruit and Veggie Juice
Recipe created by Epicurean Mom
Yields 2-16 ounce glasses

Ingredients:
3 beets, rinsed and sliced (if necessary)
2 pints fresh blueberries, rinsed
3 apples, sliced (if necessary)
1/2 cup arugula micro greens, rinsed
1 bundle red chard, rinsed
1 bundle dandelion greens, rinsed
A handful of spinach

Preparation:
Process each ingredient in the juicer.  Pour into a chilled glass, add agave nectar (if needed) and Enjoy! 
White Chocolate Raspberry Mousse Cups

Pin It


I just love little tiny desserts!  Less guilt, easy to pop in your mouth to run after a wild 21 month old and perfect for little fingers.  

If you are an avid Epicurean Mom reader you know about my tiny dessert obsession...Lemon Blueberry Cheesecake BarsBerry Cheesecake HeartsCherry Pie PopsMini Graham Cracker Sables with Raspberry Sauce and Mini Snowflake Macarons


What's better then mini bite-size desserts?  Mini bite-size desserts with edible white chocolate wrappers, of course!  No more fussing with peeling the wrapper away.


I call the filling 'mousse', although it's a simple two ingredient cream.  I do like traditional mousses but find they can often be too rich with the added eggs or egg yolks.  My mousse is a light combination of whipped cream and white chocolate; with an added raspberry surprise. 


Wouldn't these look cute on your Easter dessert table?  Or for a cute baby shower? Or a sweet 1st birthday?  Or for any day! We have a few babies being born in our family this year so these will definitely be gracing the dessert bar.


White Chocolate Raspberry Mousse Cups
Yields 12 mini mousse cups
Recipe created by Epicurean Mom

For White Chocolate Cups:
12 ounces good quality white chocolate, chopped

Line a mini muffin tin with mini liners.

In a double boiler, pour in half the white chocolate, stir until completely melted.  Take off heat add the rest of the chocolate.  Blend until no white chocolate lumps remain.  Set chocolate aside until cool to the touch.  Once cooled, spoon a teaspoon of chocolate into each liner.  Using a small pastry brush, evenly spread chocolate up the sides and along the bottom.  Repeat with remaining liners.  Put the chocolate cups in the freezer for 1 hour, to harden.  Apply a second chocolate coat to the cups and freeze for 2 hours.  Peel the liners away from the chocolate and transfer to the refrigerator, in an airtight container.

For filling: 
8 ounces good quality white chocolate, chopped
2 cups whipping cream
1/4 cup raspberry jam

Place white chocolate in a heat-proof bowl.  Set aside.  In a small saucepan, bring 1/2 cup cream to a slow boil.  Once the edges start bubbling, pour over white chocolate.  Stir until no lumps remain.  Set aside to cool.  

In a bowl of a standing mixer fitted with the whisk attachment, beat the remaining cream on med-high speed, until soft peaks form.  Fold 1/2 whipped cream into the chocolate, until well combined.  Fold in the remaining whipped cream, cover with plastic wrap and chill in the refrigerator for at least 3 hours.  

Assembly:
Spoon 1/2 teaspoon raspberry jam into each white chocolate cup.  Fit a pastry bag with any desired tip, spoon a dollop of raspberry jam on the side of the bag.  Let drip down to form a straight line.  Repeat 3 more times, and fill bag with white chocolate mousse.  Carefully fill each white chocolate cup with mousse.  Set in the freezer for 30 minutes to set.  Cups can be stored in the fridge or freezer for up to 4 days.  

Watermelon and Kiwi Proseco Sorbet

Pin It

Sorbet may be one of those summer snacks you yearn for in the winter; but why wait until summer??  Living on the West Coast we have been adorned with beautiful 80 degree weather all week, and a perfect light sorbet was just in order! 

Watermelon may not be in season for some.  Instead of using fresh blended watermelon, fresh watermelon juice (such as naked juice) from a whole foods grocery store will work just fine.  


Sorbet is the easiest cold treat to make in a snap.  It just takes 3-4 ingredients and a little bit of patience.  Couldn't be easier or healthier!  This time, this icy treat was for mommy and daddy.  Although to make the sorbet kid-friendly just omit the proseco and add water.


Do you have a favorite fruit??  
Try substituting it in this recipe!  Blood oranges or pears would be absolutely delicious! 


For this recipe I used agave nectar instead of granulated sugar.  Agave nectar's glycemic index is much lower then sugar, meaning it's healthier and helps balance your body's fat storage.  Be sure to take the sorbet out of the freezer a few minutes prior to serving, since using the agave nectar will harden the sorbet slightly.


Watermelon and Kiwi Proseco Sorbet 
Recipe created by Epicurean Mom

For Watermelon Sorbet:
1 1/2 cups proseco (sparkling wine)
1/4 cup + 2 tablespoons agave nectar
2  cups fresh watermelon juice, run through a sieve
3 basil leaves, minced (optional)

In a small saucepan over medium heat, combine the proseco and agave nectar.  Bring to a rapid boil, stirring occasionally, for 2-3 minutes.  Let cool a few minutes.  

Once cooled, add watermelon juice and basil leaves to the proseco mixture, stir until well incorporated. Place in the freezer for 2-3 hours, or until chilled.  Pour watermelon mixture into the basin of an ice cream maker and use according to manufactures instructions.  Spoon into a freezer safe container, and freeze for up to 5 hours.  Garnish with mint and serve. 

For Kiwi Sorbet:
2 cups proseco (sparkling wine)
1/4 cup + 3 tablespoons agave nectar
2  cups fresh kiwi juice, run through a sieve 

In a small saucepan over medium heat, combine the proseco and agave nectar.  Bring to a rapid boil, stirring occasionally, for 2-3 minutes.  Let cool a few minutes.  

Once cooled, add kiwi juice to the proseco mixture, stir until well incorporated. Place in the freezer for 2-3 hours, or until chilled.  Pour kiwi mixture into the basin of an ice cream maker and use according to manufactures instructions.  Spoon into a freezer safe container, and freeze for up to 5 hours.  Garnish with mint and serve. 

Nutella Baklava

Pin It

We are huge Nutella eaters in this house!  The girls think it's 'chocolate', and it's my excuse to indulge in a slightly sinful snack.  Be it slathered on toast in the morning or as a sweet snack in the afternoon, I adore the creamy hazelnut spread!  


Since I've been on quite the tea kick lately, and trying to phase out coffee *GASPS*  I wanted a sweet tea-time snack.  Baklava is that perfect airy dessert, sweetly scented with honey.  Hubby usually comes home with a box filled with homemade baklava during the holidays.  I must admit, I look forward to those nutty bars!  Alas, the holidays are over and I have a hankering for baklava.

Trying to fulfill my baklava cravings, I came across the most amazing recipe that included Nutella!  Brilliant!  I, of course, made them the very next day.  


Enjoy! 


Nutella Baklava 
Yields 24 squares
Recipe adapted by My Recipes 

Ingredients:
3/4 cup honey
1/2 cup water
1 cinnamon stick
1 cup Nutella spread
1/2 cup toasted hazelnuts, coarsely chopped
1/2 cup roasted pistachios, coarsely chopped
1/3 cup blanched toasted almonds, coarsely chopped
1/3 cup toasted walnuts, coarsely chopped
1/2 teaspoon ground cinnamon
1/8 teaspoon salt
cooking spray
24 sheets frozen phyllo dough, thawed
1/2 cup unsalted butter, melted

Preparation:
Combine honey, water and cinnamon stick in a medium saucepan over low heat; stir until honey dissolves.  Increase heat to medium and cook (without stirring) for 7-10 minutes, or until a thermometer reads 230 degrees.  Take off heat, and cover to keep warm.  Discard cinnamon stick.

Preheat oven to 350 degrees.  Place Nutella in a microwave-safe bowl; microwave for 45 seconds to melt.  Combine all nuts, cinnamon and salt in a small bowl.  Toss to coat.  

Lightly coat a 9x13 baking pan with cooking spray.  1 phyllo sheet at a time, place lengthwise in bottom of prepared pan allowing ends to extend over the edge slightly; brush evenly with butter.  Repeat with 5 phyllo sheets and butter.  Spread 1/3 of nutella over the last phyllo sheet, in an even layer.  Sprinkle with 1/3 of nut mixture.  Repeat process twice ending with 6 phyllo sheets on top of the last layer of nuts.  Gently press into pan.

Make 3 lengthwise cuts and 5 crosswise cuts to form 24 portions, using a sharp knife.  Bake at 350 degrees for 35 minutes, or until phyllo dough is golden brown.  Remove from oven and drizzle with honey.  Cool; store at room temperature in an airtight container. 

Butternut Squash and Sage Pizza

Pin It

While perusing the site real simple I came across a delicious ricotta butternut squash pizza.  Ricotta is one of my top 5 favorite cheeses but I wanted to change it up a bit, since we just indulged in my Eggplant Parmesan a few days ago. 


My girls adore making pizzas!!  

 It really brings out the creativity in kids, and allows them to 'play' with their food. When are kids actually allowed to play with their food? My kids sure as heck aren't, that's why this is extra special for them!  They love diving into the toppings, even if they don't like them, such as onions...see above! 


After the girls helped me assemble the pizza, hubby put the kiddos to bed and we had a nice pizza dinner for two! 


Butternut Squash and Sage Pizza
Yields a 10-inch pizza
Recipe created by Epicurean Mom

Ingredients:
1 pizza dough-pre-made or store bought
1 small onion, peeled and sliced 
13 fresh sage leaves, chopped plus a few whole leaves for garnish
1/2 small butternut squash, peeled and diced into 1-inch squares
1 teaspoon fresh garlic, minced
3 1/2 tablespoons olive oil, plus more for drizzling
1/2 cup mozzarella cheese
1/2 cup monterey jack cheese
Salt and pepper to taste

Preparation:
Preheat oven to 375 degrees.  Lay diced butternut squash onto a baking sheet, drizzle with olive oil.  Toss to coat.  Bake for 10-15 minutes, or until just tender. Let cool slightly.

Heat 1 1/2 tablespoons olive oil in a medium skillet over medium heat.  Add the onions and cook, stirring frequently, until browning and caramelized, about 10-15 minutes.  Set aside.

On a lightly floured piece of parchment paper, pat out dough to form a 10-inch circle.  Make sure the sides are slightly thicker to form a crust.  Set aside until ready to assemble.  

Heat 1 tablespoon olive oil in a small skillet over medium-low heat, add chopped sage leaves.  Stirring constantly, cook until fragrant and starting to crisp, about 3 minutes.  Immediately take off heat and add 1 teaspoon minced garlic, stir until well combined.  

Preheat oven to 500 degrees.  If using a pizza stone, preheat the stone with the oven for about 20-25 minutes.

Pour sage mixture into a small cup, add 1 tablespoon olive oil and spread over the pizza dough with a basting brush.  Generously sprinkle dough with salt and pepper.  Add the caramelized onions, mozzarella and monterey jack cheese.  Evenly spread the butternut squash on top of the cheese and sprinkle with a few whole sage leaves.  

Bake for 7-10 minutes, or until a golden brown.  Let cool for 5 minutes before serving.  

Eggplant Parmesan

Pin It

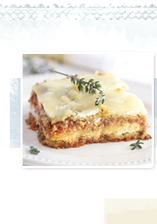
It only made sense to make my hubby's favorite dish for Valentine's Day.  Eggplant parmesan is a wonderful make ahead meal full of lots of delicious leftovers. (I love leftovers!)   It's also a great dish to make 2 or 3 of in a snap.  One of my dearest friends had a baby 3 weeks ago and this was the perfect meal to make for their special V-day dinner!  


I've had many different types of eggplant parmesans.  Some good, some not so good.  I'm not a fan of thick cut eggplant that turns mushy after cooking.  I'm more of a thin cut crunchy gal!  To date, hubby says my parmesan is the best he's ever had.  Not a bad review!  


My recipe is a mishmash of many I've eaten, cooked, and read about. 

I hope everyone had a very special Valentine's Day!

Eggplant Parmesan  
Recipe created by Epicurean Mom

Ingredients:
2-3 japanese eggplants, peeled and sliced thinly into rounds (or to your liking)
1 egg
1 tablespoon water
1/2 cup bread crumbs
1/2 cup seasoned bread crumbs
8 oz baby bella mushrooms, chopped 
1 tablespoon olive oil, plus more for drizzling
1 small shallot, minced
1/2 teaspoon fresh garlic, minced
1/2 tablespoon thyme leaves, chopped if desired
1 jar marina sauce
1 cup mozzarella cheese, grated
1 cup parmesan cheese
15 oz part skim ricotta cheese
salt and pepper to taste

Preparation:
Preheat oven to 375 degrees.  Grease a baking sheet with olive oil, set aside.  

Pour the 2 bread crumbs together on a plate and mix.  Beat the egg white and water together, until well combined.  Dip an eggplant round into the egg wash then coat with bread crumbs, set onto prepared baking sheet. Repeat until all rounds are dredged (you may need to baking sheets for all the rounds, or bake them in batches.)  Sprinkle some salt over the tops of the eggplant and bake for 10-15 minutes, or until golden brown.  Turn eggplant over, sprinkle with salt and bake for another 7-10 minutes, (We like ours crispy and dark brown) cooked until desired doneness.  Set aside to cool.  Lower heat to 350 degrees.  

In a large skillet over medium heat, heat tablespoon of olive oil.  Combine the shallot and garlic, cooking until fragrant.  Add the chopped mushrooms and thyme to the skillet, stirring well.  Season with salt, pepper and add any spices of your liking (I use a sprinkle of 21 seasoning salute form Trader Joe's.)  Cook until the mushrooms are reduced and browning.  Pour the marinara, over the top of the mushroom mixture, stirring for about 2 minutes.  Remove from heat.  

Grease an 8 x 10 pan with olive oil.  Spread half the marinara sauce over the bottom, half the eggplant rounds, evenly spread half the ricotta cheese over the eggplant, half the mozzarella and finish with parmesan cheese.  Repeat this process, finishing with parmesan cheese.  

Bake the eggplant parmesan at 350 degrees for 35-45 minutes, or until bubbly and browning on the top.  Let cool for 10 minutes before serving.

Maple Glazed Brussels Sprout Bruschetta Topped with Candied Pecans

Pin It

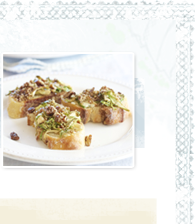
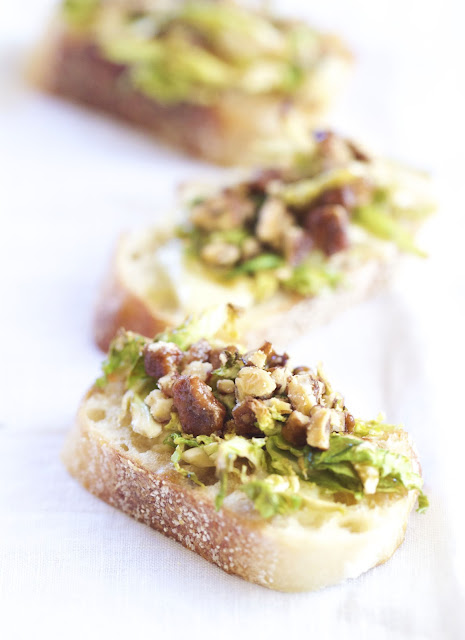
Roasted brussels sprouts per the request of one the most valued readers of Epicurean Mom (my sister!) Although these aren't just roasted brussels sprouts: boring!  It's a sweet bruschetta appetizer: winner!  These bite-size dreams are glazed with a maple glaze, gorgonzola and topped with candied pecans.  Heavenly? I think so!  


These tiny green cabbages should not be overcooked. If overcooked they turn bitter and mushy, which is why many profess their great dislike to them.  Although if you make sure to cook these cute micro veggies properly, I promise you will be hooked!


I think my sister knows what appetizer will be made on her next visit!  You excited sister??


Maple Glazed Brussels Sprout Bruschetta Topped with Candies Pecans 
Recipe adapted by Epicurean Mom
Yields about 20 bruschetta

Ingredients:
1/2 cup maple syrup
1 tablespoon aged balsamic (I used a 25 year aged)
1/8 teaspoon garlic, minced
15-20 brussels sprouts, rinsed, halved and cut into thin strips
salt and pepper to taste
20 slices french or sourdough baguette 
1/4 cup olive oil
1/2 cup crumbled gorgonzola
1/4 cup candied pecans, chopped finely

Preparation:
Combine maple syrup, aged balsamic and garlic in a small skillet over med heat.  Stirring well until well combined.  Once starts to bubble take off heat, let cool.

In a small bowl combine half the maple glaze with the brussels sprout strips.  Toss to coat, season with slat and pepper, set aside.

Preheat oven to 350 degrees.  Line bread on a baking sheet, brush tops evenly with olive oil.  Sprinkle gorgonzola over the top, top with brussels sprout mixture and sprinkle with candied pecans.  Bake for 5-8 minutes, until fragrant but not browning. Let cool and drizzle with remaining maple glaze and serve.

Chili with Chipotle {3 Bean Recipe}

Pin It

After a Dailey Method or Pilates workout I crave a meal that's hearty, healthy and enriched with protein.  (On a side note if you haven't checked out the dailey method, I suggest you do!)

Eating healthy can be, well, slightly boring and monotonous.  I love salads, grilled veggies, quinoa and raw foods; although sometimes these can be on the light side.  After a hard workout protein is what your body craves.  Chili is hearty, healthy and veggie filled...everything your muscles need.


A hearty chili meal isn't a "real" chili without its partner in crime...corn bread.  If you want to avoid unwanted calories, skip the corn bread; although I wouldn't recommend it!


My chili is super simple, quick and easy to adapt. 

Enjoy! 


3 Bean Chili


Ingredients
1 tablespoon olive oil
1 teaspoon garlic, minced
1 onion, diced, plus 1/4 cup for garnish
1/2 red bell pepper, diced
1/2 green pepper, diced
2 carrots, diced
2 teaspoons cumin
1/4 teaspoon thyme
1 teaspoon oregano
1/4 teaspoon 21 seasoning salute (from trader joes) *Optional*
1 bay leaf
1.2 lbs lean ground beef/turkey
2 1/2 cups water
4 cups diced tomatoes ( I used Pomi brand)
1 chipotle pepper (in adobo sauce), minced
2 1/2 teaspoons adobo sauce
1 can organic kidney beans, rinsed
1 can organic black beans, rinsed
1 can organic pinto beans, rinsed
salt and pepper to taste
sour cream, garnish
cheddar cheese, grated, for garnish

Preparation
Heat olive oil and garlic in a  dutch oven (or heavy saucepan) over medium-high heat, until fragrant.  Add the onions, red/green bell pepper and carrots, stirring until soft, about 10 minutes.  Stir in cumin, thyme and oregano stirring for 1minute.  Add bay leaf, 21 seasoning salute and beef.  Cook beef until no longer pink.  Pour water, diced tomatoes, adobo sauce and chipotle pepper.  Cook partially covered for 30 minutes.

Add black, pinto and kidney beans to chili, cook for an additional 20-25 minutes.  Add salt and pepper to taste.

Serve immediately, garnishing with cheddar cheese, diced onions and sour cream.

Pomegranate Poached Pear and Apple Salad with a Pomegranate Reduction

Pin It

We have been having gorgeous sunny weather here in Southern California!!  Gorgeous enough for a beautiful light refreshing salad.  I don't know about you, but I can't seem to eat all the heavy winter comfort foods when it's a delightful 70 degrees out.  I would much rather munch on delicate greens.

After seeing this gorgeous salad from Cannelle et Vanille it gave me the inspiration for my pear salad.  I just love fresh ingredients!  


Since it is still winter and blueberries may be hard to come by for some, this salad would be wonderful with all fruits!  Or even spiced up with candied walnuts and gorgonzola.  I tend to throw nuts into most of my salads for a protein boost! 


Pomegranate Poached Pear and Apple Salad 
Serves 3-4
Recipe Adapted by Epicurean Mom

Ingredients:
3 firm pears, peeled (cored if desired)
3 apples, peeled, cored and sliced into 1/4-inch rounds
2 cups pomegranate juice
1/3 cup sugar
1/2 cup pomegranate arils (seeds)
1/2 cup fresh blueberries
2 cups baby arugula, rinsed
Walnuts or candies walnuts (optional)
Gorgonzola (optional)

Preparation:
Combine pom juice and sugar in a medium saucepan, stir.  Over medium heat bring juice to a boil, lower heat to a simmer and add the whole pears.  Simmer the pears for about 10-15 minutes.  Turn pears and simmer for an additional 10-12 minutes, until tender and easy to pierce with a fork.  Let cool in the pom juice for 10 minutes then remove and let cool completely.  Once cool cut into 1/4-inch rounds, set aside.

Once pears are removed turn heat to medium and bring to a boil.  Boil pom juice mixture until thickened, syrupy and reduced by half (stirring occasionally.)  It should take about 10 minutes.  Remove from heat and let cool completely.  

Lay arugula over bottom of plate, top with apple and poached pear.  Drizzle pomegranate reduction over the top and sprinkle with desired garnishes.  Repeat with remaining plates.  Serve and Enjoy! 
Related Posts Plugin for WordPress, Blogger...
 

© Epicurean Mom. All Rights Reserved. | Blog Design By Penny Lane Designs