Jalapeno Cheddar Scones


I was sifting through one of my regular blog rolls, Smitten Kitchen, and happened upon the most delicious sounding scones.  If you know me, you know I LOVE jalapenos! Jalapeno pizza, jalapeno bagels, stuffed jalapeno peppers, jalapeno muffins,  jalapeno dips, and on and on and on....

When I found this delicious scone recipe I had to make it, especially since it called for 2 jalapeno peppers.


While the scones were baking Ky quickly jumped off the couch and said "Mommy, mommy!  Are you making macaroni and cheese??"  I must admit these comfort scones definitely have a macaroni and cheese smell, especially since they have cheddar goodness baked inside!  

Surprisingly both my girls adored these scones, which for me, was really surprising considering my oldest daughter hates heat or spice.


Jalapeno Cheddar Scones
Recipe Adapted from Smitten Kitchen via NYMag


Ingredients:
2 cups unbleached all-purpose flour + 1 tablespoon flour
1 tablespoon baking powder
1 teaspoon salt
8 tablespoons cold butter, diced (1 stick)
1/2 cup heavy cream
2 eggs
1/4 pound sharp cheddar cheese (I used sharp cheddar and sharp white cheddar)
2 small jalapeno peppers, diced
Egg Wash (1 egg beaten with 1 tablespoon water)


Preparation:
Preheat oven to 400 degrees

In a small skillet, melt the butter and saute the jalapenos until soft, about 2-3 minutes.  Set aside and let cool.  Combine the cool jalapenos and cheddar cheese in a small bowl and coat with 1 tablespoon flour.

Combine flour, baking powder, butter and salt into a food processor or, pastry blender, and pulse until mealy.  Lightly whip the eggs and cream, and to the flour mixture.  Using a spoon fold dough until it begins to come together, add the jalapeno cheddar mixture and mix until well incorporated.

Place the dough on a heavily floured surface and knead dough gently, for less ten one minute.  Pat dough out to a 3/4-to-1-inch rectangle.  Cut out 8 triangles or circles (with a circle cutter.)  Combine the egg wash and brush the tops of the scones.

Line a baking sheet with parchment paper and bake for 20-25 minutes, or until golden brown.
Chicken Pot Pie {Recipe)


Years ago I asked my husband If he liked chicken pot pies.  He promptly replied "Well, they are not my favorite.  I remember, as a child, eating the frozen pies and they seemed rather salty and full of MSG."  I quickly replied "Oh NO, homemade pies are completely different than frozen store bought pies"  He, of  course, loved it! 

I just love the smell of pot pies in the oven.  The entire house fills with the exquisite savory smell of chicken swirled with peas, carrots and onions mixed with the dainty aroma of the buttery pastry!!  It's probably one of my favorite kitchen smells!  There's a reason why it's called 'Comfort Food'! 


Recently a friend that I've connected with through a non-profit that I volunteer for, PEP (Postpartum Education for Parents), tore her ACL.  All her friends band together to create a 'Care Calendar' for her. A 'Care Calendar' is a way for friends and supporters to help bring meals or childcare for someone in need.  

It's so helpful and important to have friends/community members that will come to the aid of those that need it.  It takes a village to help raise kids regardless of a tragedy or not. To think of those that are injured or sorrowful and need companionship or help is beyond my comprehension.


Most of us (bloggers or not bloggers) have seen the tragedy with Jennie's tragic loss in Jennie's Kitchen.  To be helpless and lost is unmanageable.

How better to help is to offer donations to Jennie's Fund, through Bloggers without Borders.  Such an amazing cause and a great way to give back!


Immediately after signing up for my friends 'Care Calendar',  I knew I had to make a comforting chicken pot pie.  It's a family and kid pleaser!

Most like to skip on the homemade crust and buy store bought.  Why?? It's the easiest to prepare and tastes beyond any store bought.  Take the 5 minutes and make homemade crust, you won't regret it....promise!!


Chicken Pot Pie
Pot pie recipe adapted from Ina Garten
Butter crust by Epicurean Mom
Makes 5-6 6-inch pot pies 


Ingredients  


For Filling:
2 whole chicken breasts, bone-in and skin on (4 split)
3 1/2 tablespoons olive oil
Sea salt
Fresh ground pepper
4 cups chicken stock, homemade or store bought
2 teaspoons better then bouillon (chicken)
12 tablespoons unsalted butter
2 cups chopped yellow onion, about 1 large onion
3/4 cup unbleached all-purpose flour
1/4 cup heavy cream
2 cups course chopped carrots
2 cups sliced celery
1 (10 ounce) package frozen peas
1/4 cup chopped parsley

For Crust:
1 3/4 cups unbleached all-purpose flour
1 teaspoon salt
1 1/2 sticks cold unsalted butter, cut into cubes
1/3-1/4 cold water
1 egg and 1 tablespoon water (for egg wash)

Preparation


For Filling:
Preheat oven to 350 degrees.

Place chicken breasts on a baking sheet drizzle with olive oil on both sides massage into chicken. Sprinkle with salt and pepper and bake for 30-40 minutes, until cooked through.  Let cool then cut the chicken into large cubes.

In a saucepan heat the stock and bouillon, until almost boiling, simmer.

In a large dutch oven melt the butter over med-low heat, add the onions. Cook until soft and translucent, 7-10 minutes.  Stir in the flour, continuously stirring until thickened.  Pour the warm stock mixture into the dutch oven.  Simmer over low heat until thickened, about 3 minutes.  Stir in heavy cream, salt and pepper.  Add the chicken, peas, celery, carrots and parsley.  Mix until well combined and take off heat.

For Crust: 
In a food processor, combine flour, salt, and cubed butter.  Pulse until flour mixture looks mealy.  While food processor is running pour cold water, in 1 tablespoon increments, until the dough just comes together.  Be sure not too add too much water or the dough will be soggy.

Assembly:
Preheat oven to 375 degrees.

Pour the filling, evenly between ovenproof bowls.

Lightly flour sil pat, or any surface.  Divide the crust into 5-6 pieces (depending on how many pot pies you need.)  Roll out each piece into a 8-inch circle.  Place each dough circle over filled bowl and crimp the sides and trim the edges.

Whisk the egg and 1 tablespoon water and brush on the top and edges of pot pies.  Make 3 slits on the top and bake for 45 minutes-1 hour, until golden brown and the filling is bubbling.Jennie's Fund

Red Velvet Cake with Raspberries and Blueberries


Ah, I love spending time with family...


My sister came down to visit from up North.  Even though she doesn't live across the country or even in a different state, it's still hard for us to find time to visit.  Family, work and life usually seems to create some sort of barrier.  When the time is found it's so relaxing to eat great food, drink wonderful wine and catch-up on over-due chit chat.


I have never been wine tasting in Sonoma or Napa (which I would love to do) but I do adore our quaint Santa Ynez Valley Wine Country (wine tasting post to come.)  We spent a day visiting a few wineries, enjoying the scenery and chatting with all the friendly people.


I just love neighborly people!!  It's so refreshing and invigorating to meet genuine, sweet individuals.  Unfortunately, it seems this has been lost over the years.


While in the Santa Ynez Valley we, of course, stopped by the wonderful Mattei's Tavern (see my last post) and indulged in delicious breads and foods.  We, unfortunately, over-stuffed ourselves to revel in dessert glory and I've had dessert on the mind ever since.

I do like rich desserts but am more of a light dessert indulger.


Fresh fruit makes desserts so much more delectable, at least to me.  I love fresh made whipped cream with fruit, fruit tarts, fruit tulips, fruit compote, fruit fruit fruit!!

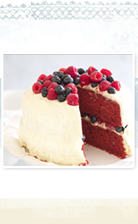
This light red velvet cake was a perfect dessert to pair with fresh raspberries and blueberries.  Cake...light??? It really is!  It's extremely moist, fluffy with a light cream cheese frosting.  I did make a few changes to the recipe i.e. more buttermilk, 1 more tablespoon cocoa powder, added yogurt and added another stick butter and I thought it came out perfect!

After only a mere 6 hours, after baking, there's only 1/3 cake left!


I hope you enjoy this as much as we did!


Raspberry and Blueberry Red Velvet Cake
Recipe Adapted from Bon Appetit
Servings 12


Ingredients


For Cake:
2 1/4 cups sifted cake flour (sifted then measured)
3 tablespoons unsweetened cocoa powder
1 teaspoon baking soda
1 teaspoon baking powder
1/2 teaspoon salt
1 3/4 cup buttermilk
1 tablespoon red food coloring
1 teaspoon distilled white vinegar
1 teaspoon vanilla extract
1 1/2 cups granulated sugar
1 cup (2 sticks) unsalted butter, room temperature
2 large eggs
3 tablespoons fage yogurt (thick greek yogurt)

For Frosting:
2-8 ounce packages cream cheese, room temperature
1/2 cup (1 stick) unsalted butter, room temperature
1 tablespoon vanilla extract
2 1/2 cups powdered sugar, sifted

1 1/2 pints fresh raspberries
1 1/2 pints fresh blueberries

For Cake:
Preheat oven to 350 degrees.  Butter and flour two 9-inch cake pans with 1 1/2 inch high sides.  Sift sifted flour, baking soda, baking powder, salt and cocoa powder into a medium bowl.  Whisk buttermilk, food coloring, vinegar and, vanilla in a small bowl to blend.  Using an electric mixer, beat sugar, fage yogurt and butter in a large bowl until well blended.  Add eggs 1 at a time, beating until well blended after each addition.  Beat in dry ingredients in 4 additions alternately with buttermilk mixture in 3 additions.

Divide batter between prepared pans.  Bake cakes until tester inserted in the middle comes out clean, about 25-30 minutes.  Cool in pans for 10 minutes.  Turn cakes out onto racks, cool completely.

For Frosting:
Beat cream cheese and butter in a large bowl until smooth.  Beat in vanilla.  Add powdered sugar, slowly, and beat until smooth.

Place 1 layer, flat side up, on platter.  Spread 1 cup frosting over the top of the cake.  Arrange 1 basket raspberries and 1/2 basket blueberries atop frosting, pressing lightly to adhere.  Top with second cake layer, flat side down.  Spread remaining frosting over top and sides of cake ( i prefer the messy cake look or smooth the frosting out.)  Arrange blueberries and raspberries decoratively over the top.

Roasted Garlic and Rosemary Focaccia


Here in Southern California  Mattei's Tavern, in Los Olivos, is a historical restaurant and a staple...

"The brilliant white building sits majestically on sprawling lawns and gardens, on the edge of the small town of Los Olivos.  Inside, the tavern can only be described as welcoming-lit fireplaces, cozy dining rooms and enticing aromas and from the open kitchen.  First built in 1886 as a stagecoach stop, the tavern was owned by generations of the Mattei Family.  As Felix Mattei said in 1888, 'We are first a restaurant, only by sideline a hotel.  Our menus are more important then our mattresses.  If people want a fancy hotel bedroom for the night, Los Olivos Hotel is for them.  If they want the finest food and drink in the valley-in the whole state, by garl, they will come to Mattei's' "


Two years ago my husband surprised my mother in-law, my mom and I with a a wonderful night out to the infamous Mattei's for Mother's Day.  This has quickly become a tradition in our family...

(Mattie's with Lo as a newborn)

The food is impeccable, the wine is delectable, and the ambiance is palatable.  

Think filet mignon, Pinot noir-braised short ribs, caramelized onion and potato gratin, Olallieberry Pie and Sweet-potato cheesecake!!  


As we left Mother's Day dinner last year I happened to pass by a Brother's Cuisine Cookbook.  I had to buy it!!  I immediately made their Strawberry Shortcake recipe, which so happens to be my most popular post, and fell in love!  

The past few days I've been craving bread.  I usually tend to get consumed in creating my own recipes and forget to pick up my favorite cookbooks to explore different original recipes; although I remembered the savoring thoughts of Mattei's delicious breads.  My all-time favorite is roasted garlic and rosemary focaccia and jalapeno cornbread.  Sometimes I actually look forward to indulging in their breads more then their fantastic foods.

If you have a standing mixer, dough hook attachment and a few hours...you will create the most delicious focaccia bread.


Roasted Garlic and Rosemary Focaccia Bread
Recipe adapted from Brothers Cuisine 
Makes 1 baking sheet loaf

Ingredients:
3/4 cup whole garlic cloves, peeled
1/4 cup olive oil plus 5 tablespoons
4 1/2 cups bread flour
2 teaspoons fine sea salt 
1/4 cup honey
1/4 cup fresh rosemary, chopped
1 package (2 1/4 teaspoons) active dry yeast
2 cups warm water (90 degrees)
Kosher salt, for garnish
olive oil, for panning

Preparation

To make the roasted garlic:
Preheat oven to 300 degrees.

In a small mixing bowl, toss the garlic cloves with 2 tablespoons of olive oil and spread onto a baking sheet.  Roast until soft and golden brown, about 15 minutes.  Check and stir every 5-8 minutes.  Remove and let cool.  Puree half of the rough-chopped garlic in a food processor, adding the remaining 3 tablespoons of olive oil to make a paste.  

For dough:
In a bowl of a standing mixer, combine flour, salt, honey and roasted garlic paste, rosemary and chopped roasted garlic.  

In a small bowl, whisk the yeast with 1/2 cup warm water until dissolved.  Add to the flour mixture.  Using the dough hook attachment, mix the dough on slow speed.  Slowly add the remaining warm water until dough almost comes together.  Add the olive oil, and mix until dough forms into a ball.  Scrape out dough onto a lightly floured surface.  Knead dough just enough to form a ball and place into a large. lightly oiled bowl.  Cover and let rise in a warm area until doubled in size, about 45 minutes-1 hour.

Line a baking sheet with parchment paper and lightly coat with olive oil. Press the dough into a rectangle, about 3/4-inch thick.  Using your fingertips, press dents all over the dough (this gives focaccia it's classic look.)  Let the dough rise for another 45 minutes-1 hour, or until the dough almost doubles size.

Preheat oven to 350 degrees (335 degrees for convection oven.) 

Just before baking sprinkle dough with kosher salt.  Bake for 20-25 minutes, or until light golden brown.  Be sure to rotate pan halfway through the baking process.  Remove and let cool on a wire rack. 

Bittersweet and Red Currants


Bittersweet...

I had an amazing vacation away to celebrate a dear friend's bachelorette.  No matter how much you miss your kids, husband and family it sure is nice to have a weekend away.  It was bittersweet leaving Friday since this was the first weekend away from Ky in 2 years and my very 1st weekend/night away from Lo; but it was a much needed relaxing weekend to spend with great friends, lying at the pool and enjoying adult company! 


And it was even more amazing to come back to 2 little girls racing, grabbing my legs and a husband with all smiles and kisses when I walked through the door.  


The girls refused to let go of my neck and giggled with excitement for a few hours.  How fun is it to come back to such a loving home?!


I really feel blessed for all that I have, which could be lost in a heartbeat.  Many fellow bloggers have blogged about Jennie Perillo's husband that lost his life so suddenly and tragically.  It really makes you appreciate how fragile and quick life is.  

Don't ever forget to kiss your kids, husband and family every minute of everyday.  


Before I left for the bachlorette fun Lo and I went by the Farmers' Market and bought a few cartons of red currants.  I've never cooked with currants and didn't realize how incredibly tart they are.  I popped one immediately in my mouth and winced.  Ohhhhh, weeeee! Were they sour!  What to make with tart berries??


I've always wanted to make a galette.  Not only are they incredibly rustic and different but look absolutely delicious!  Most of the time I will make a pie to only have half of it eaten.  Galettes' seemed to be the right way to go with these fresh currants!


Red Berry Currant and Raspberry Galette
Recipe by Epicurean Mom


makes 2 - 7-inch galettes


For Crust:
I used Martha Stewarts Pate Brisee


Ingredients:
2- 6 oz basket of red currants, stemmed and washed
2-6oz basket raspberries, washed (I halved mine since they were huge raspberries)
1 1/2 tablespoons corn starch
1 1/4 cup granulated sugar
1/2 teaspoon pure vanilla extract
1/2 teaspoon cinnamon
1/8 nutmeg
1 tablespoon fresh lemon juice
1 tablespoon butter, cut into small cubes
Turbinado Sugar (thicker sugar crystals), for garnishing

Preparation:
Preheat oven to 425 degrees.

Combine the first 8 ingredients and gently stir, be careful not to bruise the fruit.  Set aside.

Sprinkle flour on a sil pat, or any clean surface.  With your hands mold 2 discs from the prepared crust (you will have crust leftover.  Form into a disk and freeze for a later use) and roll out 2 7-inch rounds.   Transfer to a baking sheet lined with parchment paper.

Spoon the berry mixture over each 7-inch rounds until the mixture is about 2-inches from the sides.  Fold over flapping edge over edge, pinching off to secure.  Place the butter cubes over the top of the exposed berries.

Use an egg wash (1 egg whisked with 1 tablespoon water) or a butter wash (2 tablespoons melted butter) which I used, since we didn't have any eggs.  Brush along the top of the crust and bake for about 25 minutes or until the crust is golden brown and the filling is bubbling.

Serve with fresh whipped cream or vanilla ice-cream.


Salted Butter Toffee Chocolate Chip Cookies


When I was a little girl I loved anything sweet, anything sweet!  My mother likes to recall a story of a visit to the Doctor's office when I was just about 7.  As we both sat down in the waiting room I noticed a bowl of candy sitting on the table.  I immediately asked, no, begged my mom for a piece or two.  She replied "Yes, Katie but only two pieces."  I quickly picked my two pieces and happily sat down in the chair.  Once the appointment was over my mom spoke to the receptionist and off we went to the car, until my mom noticed a crackling sound.  Peculiarly, every time I took a step a loud crackle was heard.  My mom asked me to empty my pockets, out came handfuls of candy.  She then realized I had stuffed candy in my shoes, pockets and socks.  Embarrassed she marched me back to the Doctor's office.  I apologized and replaced the candy to the almost empty candy jar.  The staff said they'd seen the whole thing and thought it was very funny.  My mom wasn't laughing.  

My oldest daughter has now carried on this tradition


I'm sure my youngest will follow suit shortly.

Yes, most children do like candy, love candy at that, but my daughter's obsession seems to be over the top.  Surprisingly, I've fallen out of love with sweets.  I still like sweets but they were a passing obsession, now I much prefer a delicious veggie pizza or crisp salad over a chocolate cake.  Hopefully my daughter follows in my gastronomic footsteps! 


A few days ago Ky was asking for a sweet, which I was craving a little sweet bite too.

One of Ky's favorite candies is toffee.  I must admit, I do still have a weakness for butter toffee.  I whipped up a large chunk of salted butter toffee, that Ky happily ate up.


I used the rest of the toffee to make toffee chocolate chip cookies, another one of my weaknesses.  My daughter was beyond thrilled to have two homemade sweets in two days, so was my husband!


Salted Butter Toffee Chocolate Chip Cookies
Toffee Recipe Adapted From Epicurean Mom
Chocolate Chip Recipe Adapted From Martha Stewart


For Toffee (very easy to make):


Ingredients
1 1/2 cups brown sugar
1 cup unsalted butter
1/2 teaspoon pure vanilla extract
cracked sea salt for garnishing

Preparation
Combine sugar, butter and vanilla in saucepan on low heat until incorporated (stirring vigorously.)  Bring the heat up to med-high and bring the sugar mixture to a boil, stirring frequently.  Continue to boil until a thermometer reads between 280-300 degrees.  Do not let it exceed 310 degrees or the candy will not harden.

The toffee should be bubbling and thick.  Once desired temperature is achieved pour toffee onto a piece of parchment paper or a sil pat.  Smooth out with a spatula and let cool in the fridge, for about 10 minutes.

Once cool break into small or large pieces.  I store my toffee in an airtight container in the fridge.

For Chocolate Chip Cookies


Ingredients: 
2 1/4 cup all-purpose flour
1/2 teaspoon baking soda
1 cup unsalted butter, room temp
1/2 cup granulated sugar
1 cup packed light-brown sugar
1 teaspoon salt
2 teaspoon pure vanilla extract
2 large eggs
10 ounces semi-sweet chocolate chips
1/2 cup broken toffee pieces

Preparation:
Preheat oven to 30 degrees.  In a small bowl, whisk together flour and baking soda; set aside.  In the bowl of a standing mixer fitted with a paddle attachment the butter with both sugars; beat until light and fluffy.  Reduce speed to low, add the salt, vanilla and eggs (scrape down the sides.)  Beat until well mixed, about 1-2 minutes. Add flour mixture, mix until well incorporated.  Stie in the chocolate chips and toffee pieces.

Drop heaping tablespoons balls of dough, about 2-3 inches apart) on greased baking sheet lined with parchment paper.

Bake until cookies are golden around the edges and soft in the center 10-15 minutes.  Remove from oven and let cool completely on a wire rack.

Dark Cherry Yogurt Popsicles and Moving Blues


It's been about 3 days since our move and we are almost fully unpacked.  Even though we didn't move across the States and only moved a few miles away moving is always stressful, especially for us.  Since we lost our home in one of the latest Southern California wildfires (2 years ago) we've moved a whopping 5 times!  Luckily, this is our last move until our home is built.  


Most think building a house is a fun venture.  My husband and I try to make the most out of it but when there's consistent moving, 2 young kids, crazy work hours for my hubby and blog time it seems rather daunting.  Although my blog is a creative outlet for me. It gives me a way to express my feelings and be inventive.

Ideally, rebuilding would be easier if we were remodeling room by room but to make huge decisions all at once is rather overwhelming.  On the up-side in a year or less we will have our perfect self-designed fire-proof home.


With all of this moving and organizing I was able to appreciate the true beauty of 'cleaning house'.  Moving is time consuming and tedious but it's also cathartic.  It's nice to throw away box after box of everyday unwanted items that was unknowingly cluttering the entire house.

We unfortunately moved to a house that no longer has a pool but has a spectacular view of the beautiful ocean and Channel Islands. We can now really appreciate the true beauty of Southern California. 


Yesterday, while Ky was at summer camp, Lo and I took a stroll around our new yard picking flowers and enjoying the beautiful sunny weather.  


Lo and I probably circled the yard a dozen times finding, picking and carrying flowers


These past few days have been hot in So. Cal, unusually hot!  We now live in the foothills, which usually tends to be at least 15 degrees hotter than the city.

I stopped by the store to find a nice cool treat for the girls, when I happened onto a sale on dark cherries.  

How could I pass that up??


I immediately thought of making dark cherry yogurt popsicles for the girls.  I've always had a weakness for yogurt pops and creamsicles.  One of my biggest memories from my childhood was orange creamsicles. There's something about the smooth, cool, creamy consistency that I adore! 

I'll definitely make these in the near future but now onto dark cherry yogurt popsicles! 

Hope you enjoy it! 


Dark Cherry Yogurt Popsicles
Recipe Adapted from Epicurean Mom

Serves 10

Ingredients:
1 bag dark cherries
3/4 cup water 
1/3 cup sugar
1 1/4 cup greek vanilla or plain yogurt
1/4 cup honey or agave nectar


Preparation:
Wash and pit the cherries.  Place in a blender and blend until smooth.  

Mix the water and sugar in a small saucepan.  Simmer until reduced by 1/4.  Let cool slightly and combine with cherries.  Let cool completely.

Combine greek yogurt and honey, until well combined. 

Spoon dark cherry mixture in popsicle mold, slide the mixture side to side, and coat sides well. follow with the yogurt mixture and repeat with cherry mixture, until 3/4 full.  

Freeze for at least 6 hours.  Serve and enjoy!

Related Posts Plugin for WordPress, Blogger...
 

© Epicurean Mom. All Rights Reserved. | Blog Design By Penny Lane Designs